Mofang One is a powerful tool that can help bring your online escape room vision to life. This post provides a quick start checklist to help you get up and running!
If you get stuck at any point, or have questions about how to build a game, we’re here to help! Join our Discord server at https://discord.gg/Y2GmkfzvGk for live technical support – we want you to be successful and are willing to help with any aspect of your game creation.
Your feedback helps us improve our product and documentation, so please don’t hesitate to reach out even for the tiniest questions – they really do help us plan future improvements.
Worried about the financial cost of experimenting? During our Go Live Preview, all usage of Mofang One is free. Don’t worry – we don’t even collect your credit card information yet, and you’ll have plenty of notice before billing begins.
Have feedback or questions on our pricing plans? Feel free to reach out to us! We understand the pay-per-game approach doesn’t fit every business model, and we have alternate plans that may be a better fit for certain game formats.
Step 1: Create an account!
Follow the link in your invitation to create a Mofang One account. Fill out the form, paying particular attention to choosing a short name you like!
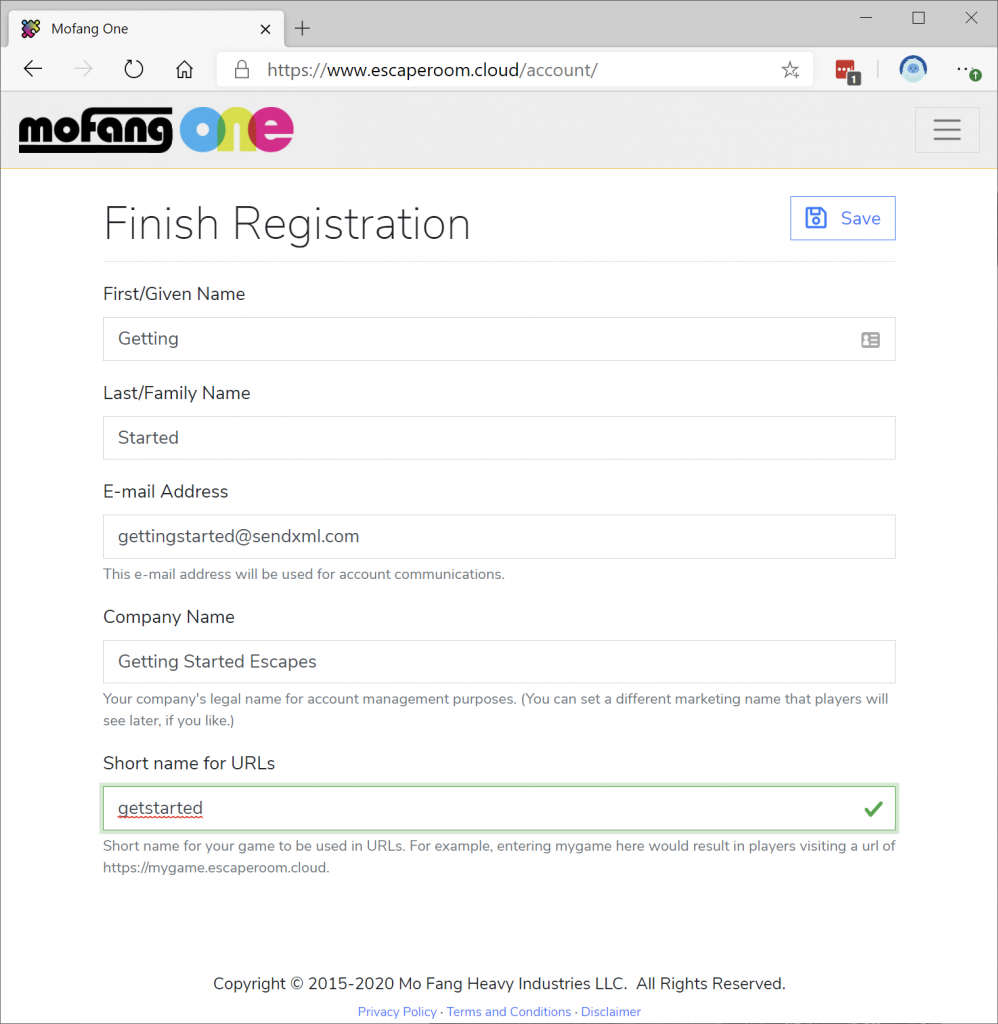
Once you click Save, wait 1-2 minutes for your very own private server to be created. We recommend watching our Getting Started video while you wait – it introduces the concepts of content, events and unlock codes which will be used throughout this guide.
Step 2: Explore the game creator
When your server is created, you’ll arrive at the main homepage. This page has tools for operating games, and will be used primarily once your game is designed and running:
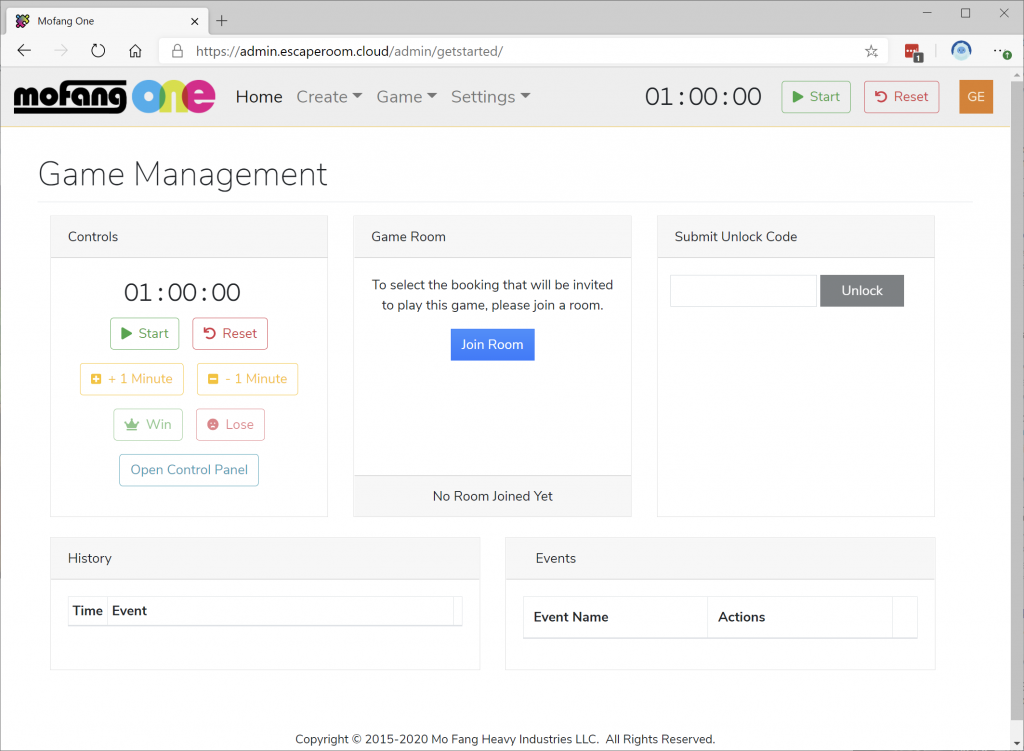
You’ll return to the Game Management screen later. For now, let’s take a look at the dropdowns at the top of the screen. Create contains tools for designing your game while Game contains tools for hosting a game. Settings provides a variety of options that control the look and feel of your game, and it also contains API keys and credentials for various external integration features.
Step 3: Create content
Content is the term in Mofang One for anything a player can see or interact with. Content items can be locked or unlocked to control what players can access as the game progresses.
We’ll start with a basic image, but Mofang One supports all sorts of content types including panoramas, 3D models, drag and drop interactive scenes and much more!
Before we can create a content item, we need to upload the image we want to use. Files are tracked separately from content, so they can be reused and replaced without changing your game structure; over the course of playtesting, you’ll frequently want to make small tweaks to art!
From the Create menu, choose Files. Then click Upload File and upload an image from your computer. When the upload completes, it will show up in the list after a few seconds:

Once the file is uploaded, it’s time to create the content! Click the Content tab:
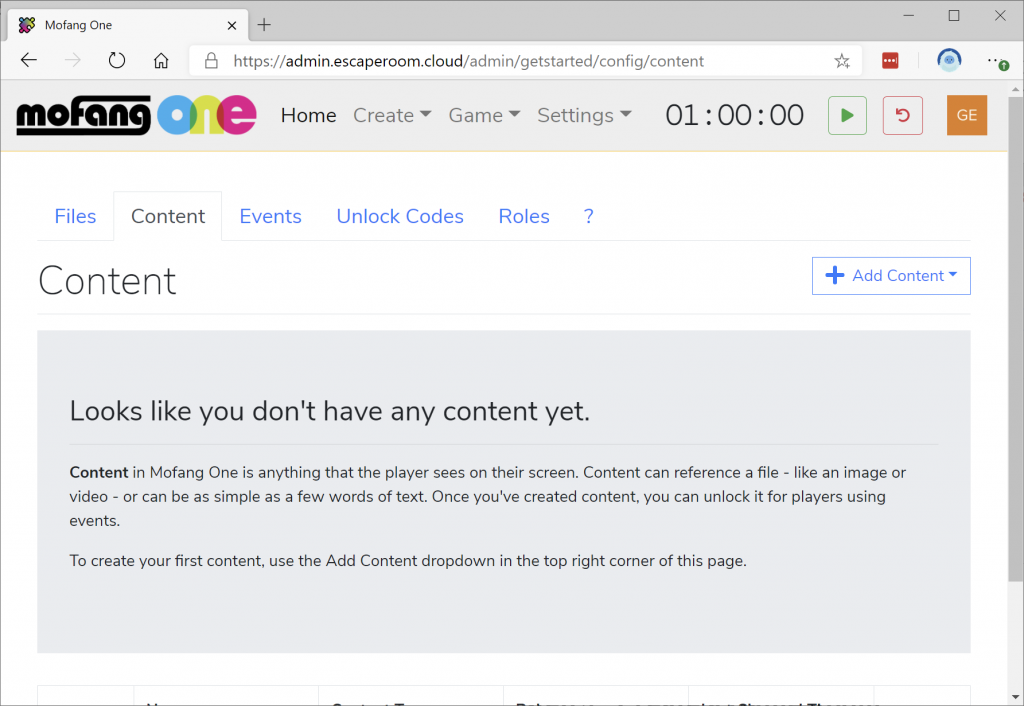
Now, click Add Content, and choose Add Image.
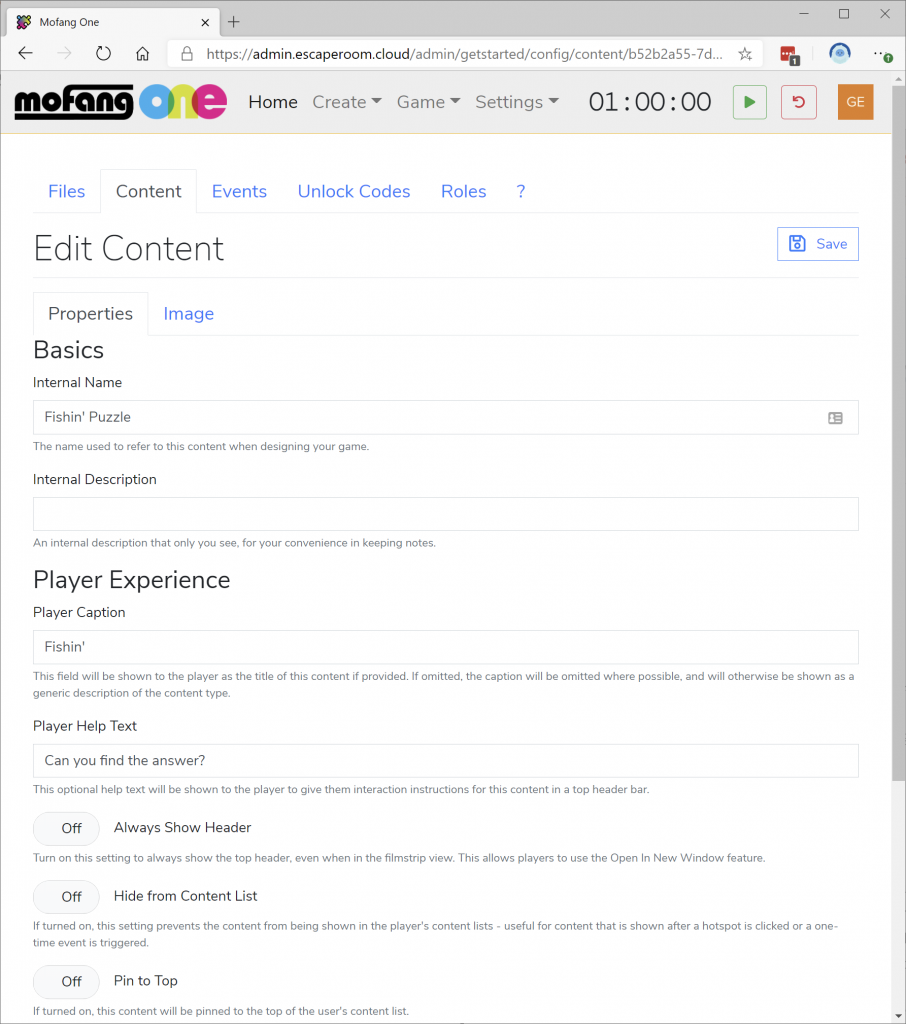
Fill out the fields to describe your content. The fields under Basics are there for your convenience while creating the game, while the fields under Player Experience affect what players see. (Sometimes, you don’t want players to see the true name of an object, or you might not want an object to have a caption at all!)
Once you’ve set up these fields, click the Image tab to set up the behavior of the content.
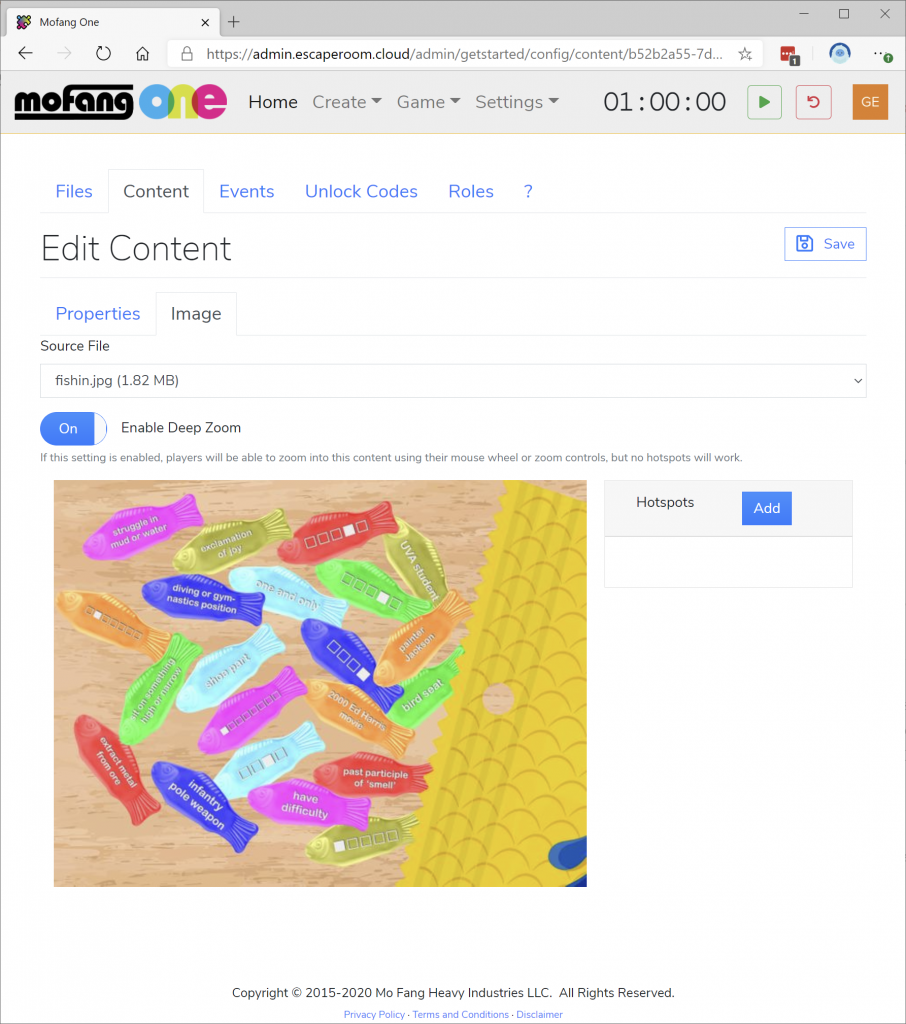
On this screen, select the file you uploaded in the Source File dropdown. You’ll also see other settings specific to the content you’re creating . In this case, because our puzzle contains small text, we’ve turned on the Deep Zoom feature which allows players to zoom into an image (similar to how an online map works).
When you’re done creating your content, click Save.
Step 4: Create a Game Room
Each team that will play your game receives a unique URL that takes them to a special “game room”. The players will wait there when they join; then, once the host joins the game room, everyone will be connected together to play.
Every booking needs a unique game room, and a game room is necessary to play.
Coming soon: By the end of November, it will be possible to run multiple games simultaneously, allowing you to offer on-demand online experiences that aren’t hosted by a live avatar. There will also be a feature allowing you to dynamically create game rooms as needed.
If this feature is something you’re interested in, please let us know in #feature-requests on Discord: https://discord.gg/Y2GmkfzvGk
To test your game, you’ll need to create your first game room. Click the Game menu, and choose Manage Game Rooms. Then, click the Add Game Room button.
Notice there are two ways players can join the game: by navigating directly to a URL with the room ID pre-filled in, or by going to your site and then entering four keywords. Both methods are equivalent; most players will use the URL, but the keywords can be helpful if you need to invite players over the phone and don’t want to read out a complicated link.
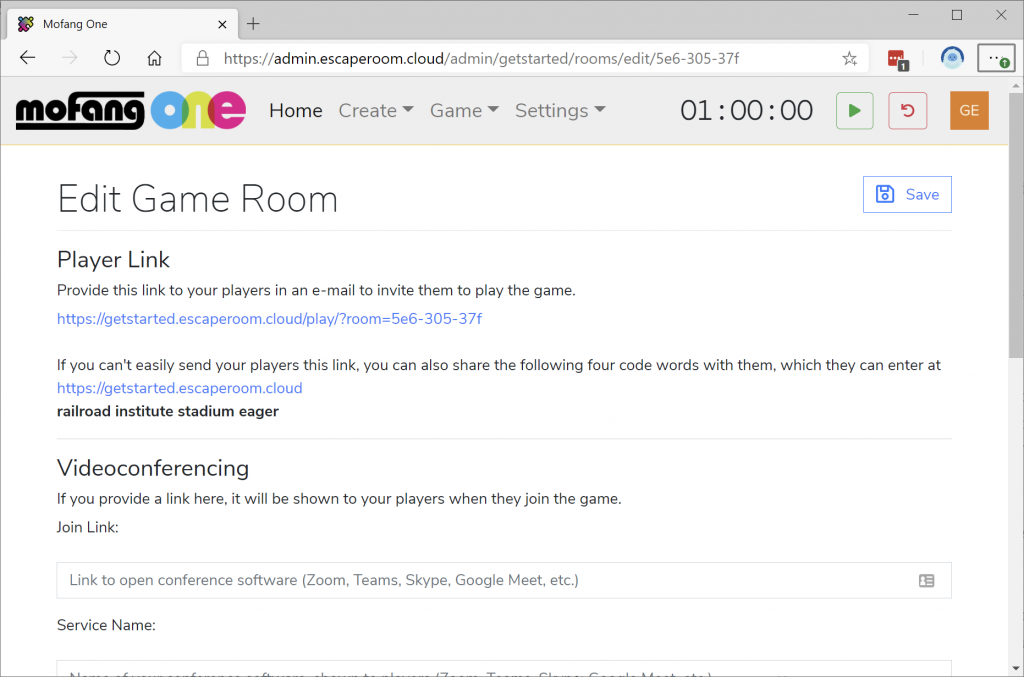
If this were a real booking, you’d fill in details for your videoconferencing call and booking. For the purposes of our developer mode room, we’ll just set Booking Customer Name to “Testing” and then click Save.
Step 5: Test your game!
Now, let’s start the game. Let’s return to the main screen by clicking the Home link:
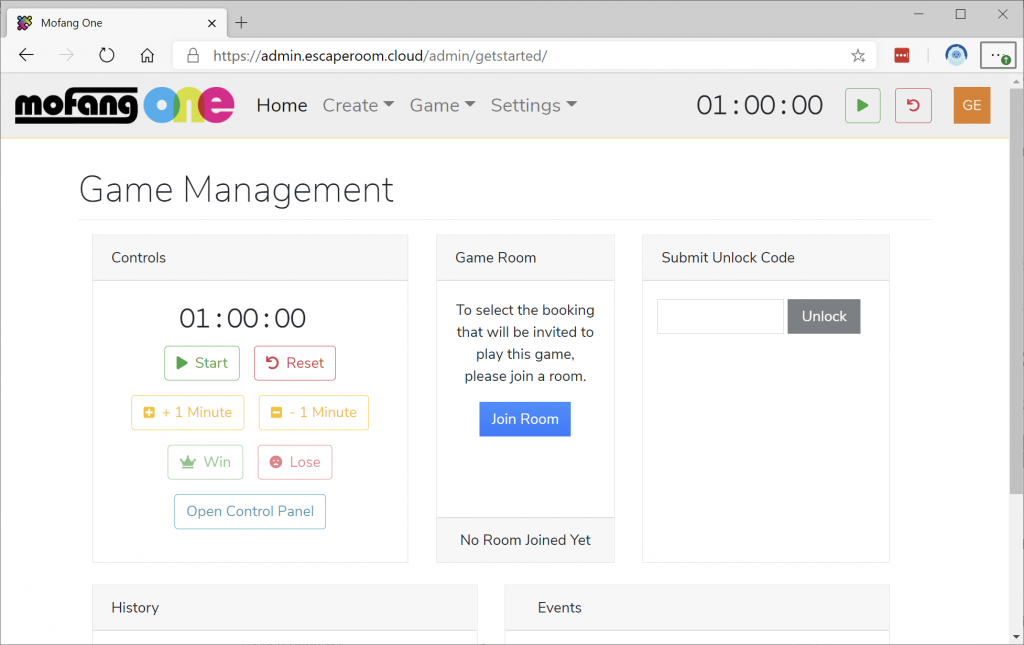
Now, click Join Room and choose the room you created from the list.
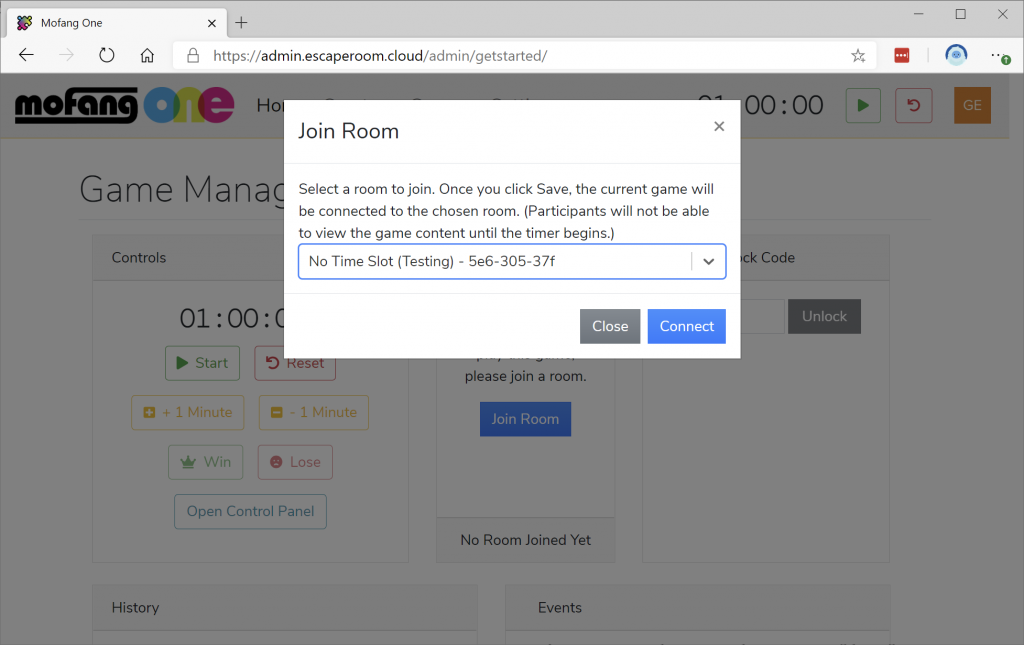
Tip: Joining the game room would get tedious if you had to do it every time you made a change. The good news is you only need to do this once while building your game, thanks to a feature called Developer Mode – you can create a room that can be reused for testing, and then you can automatically join that room every time you click the Start button. This enables rapid test/iterate cycles while you’re building your game.
To set up Developer Mode, choose Settings/General, then scroll to the bottom and pick the room you created in Step 4. Make sure to click Save to save your changes. (You might want to update other details about your game while you’re here!)
Now that you’ve joined the room, you’ll see the game room box updates. Click the link at the bottom with the four-word code to open the player view in a new window:

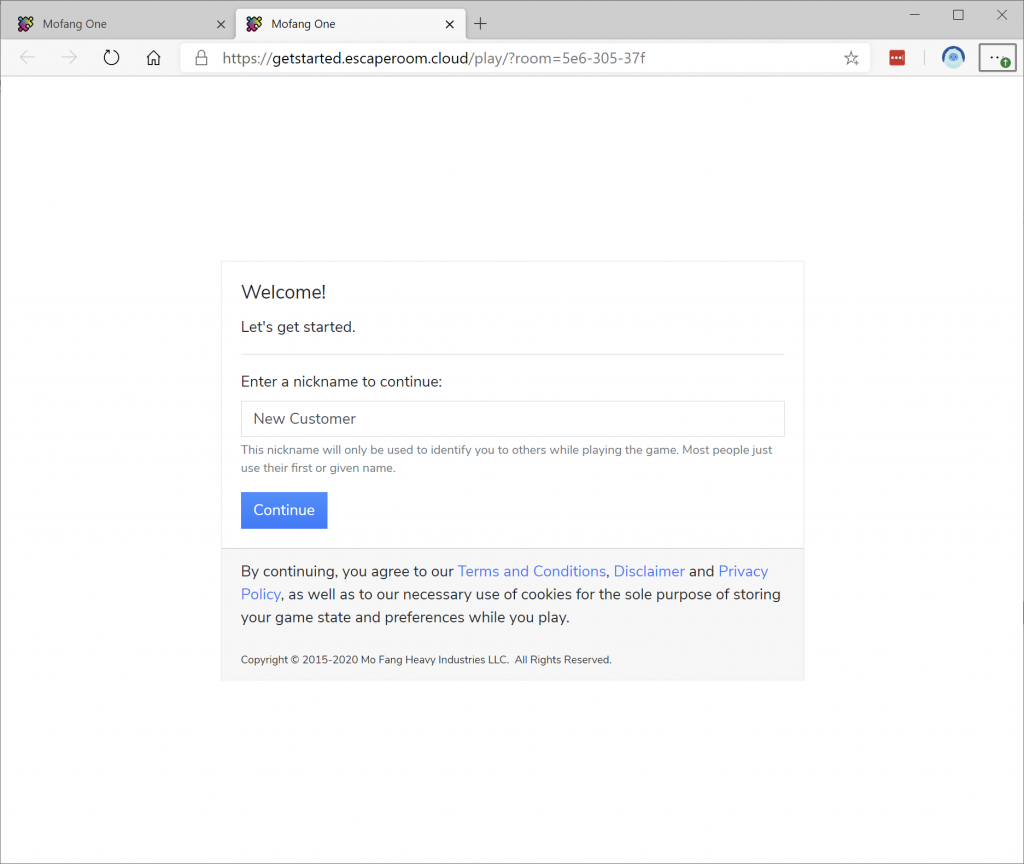
You’ll see the same welcome screen your players will see. Enter your name, then click Continue:
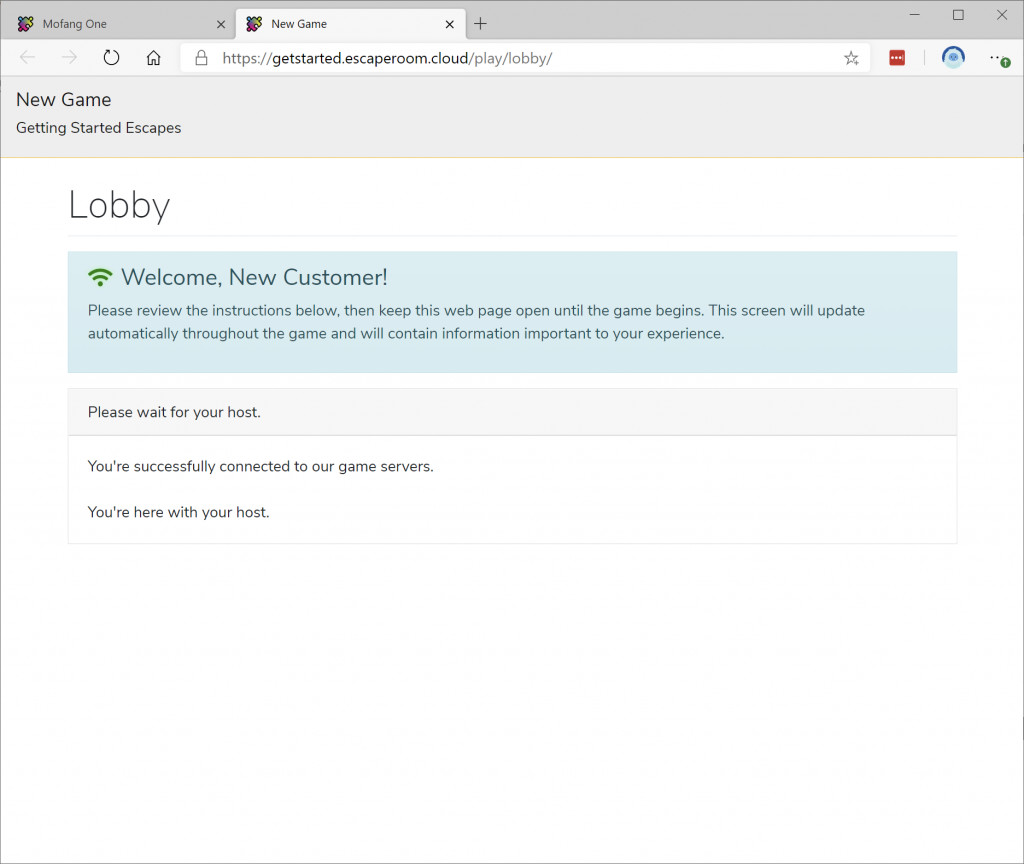
And you’ll arrive in the lobby.
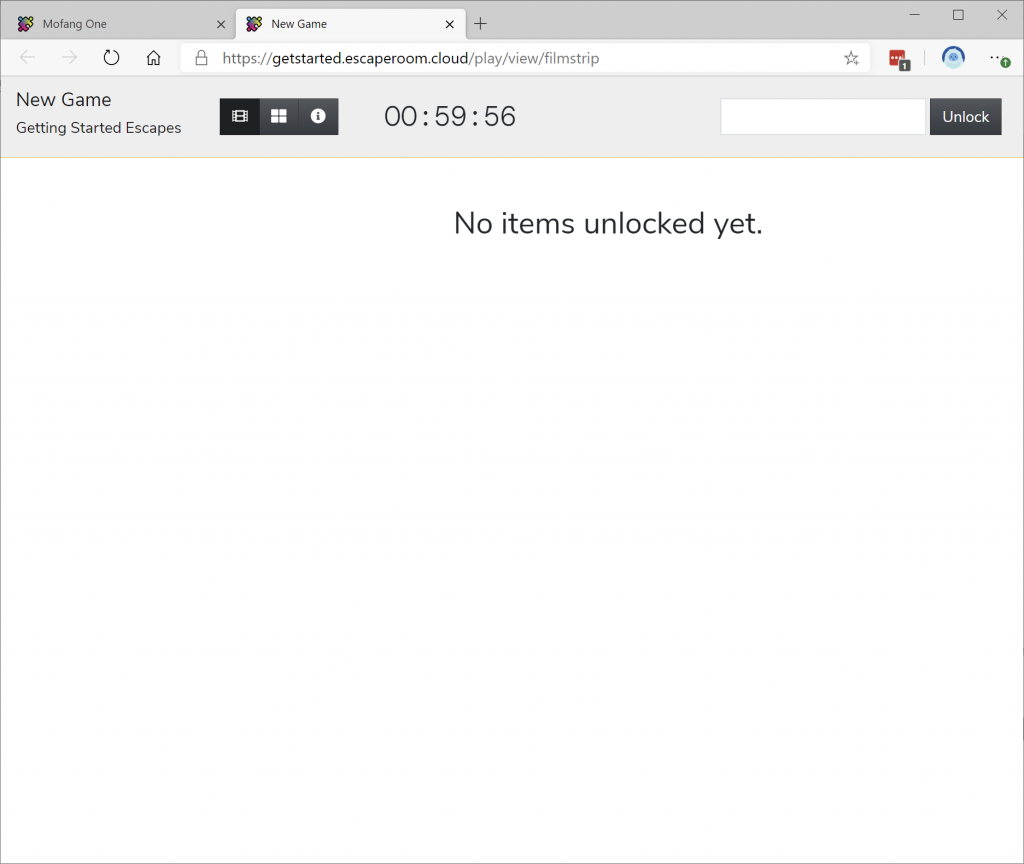
Now, return to the other window with the game host screen and click Start. Back in the player screen, the game will begin and show no content:
In the next step, we’ll automatically unlock items, but for now, let’s do it manually. Return to the host view and choose Create > Content:
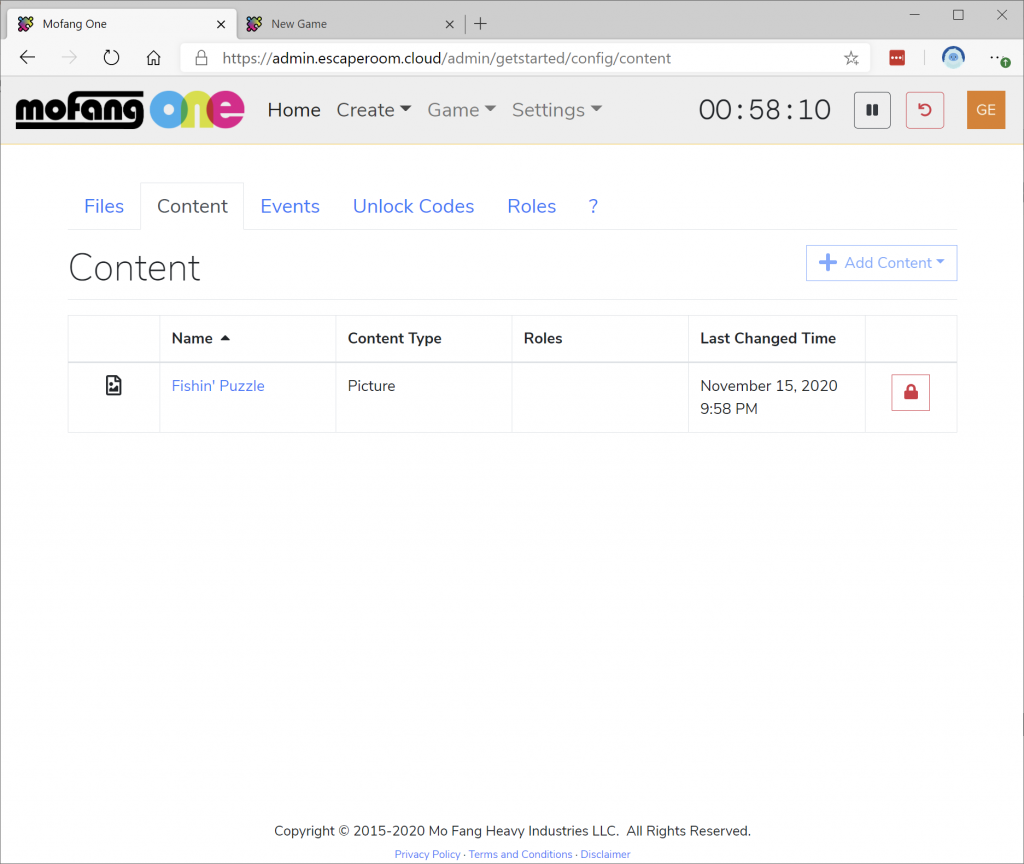
Click the red padlock to manually unlock the content. It will turn green, indicating the content has been unlocked. Now, return to the player view to see your new creation:

Step 6: Add events and unlock codes
Of course, unlocking everything manually isn’t feasible, which is why events are the core of Mofang One. An event, put simply, is anything that happens in a Mofang One game. An avatar discovering an item, a player solving a puzzle, or a sound effect playing are all examples of events.
Many Mofang One games are based on avatar control through a control panel, known in other platforms as “Magic Mode”. If you want to take this approach, you may opt to disable the answer submission box entirely and ignore the unlock code feature. But if you want to choose a simpler approach – or if you want players to enter codes or answers as part of a puzzle hunt type activity – unlock codes may be useful for your game. Unlock codes are simply aliases to events – every unlock code triggers one or more events. They are created separately to give you flexibility – that way, one unlock code can trigger multiple events, or so multiple misspellings of a word can be accepted if needed.
Let’s create an event that wins the game, and an unlock code that accepts a correct answer to trigger it.
If the game is running, reset it to re-enable design tools. Then, from the Create menu, choose Events:
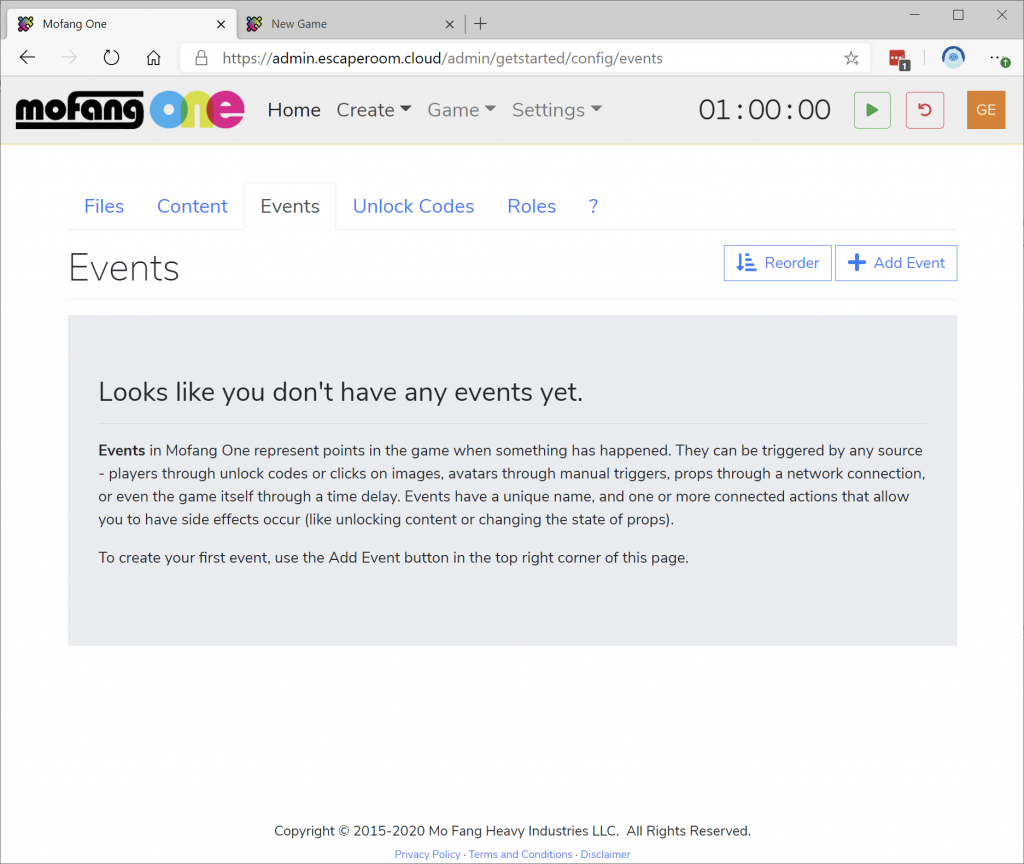
Click Add Event, and give the event a name. By convention, all events are lower case and have no spaces – this makes integrating with other systems easier in some cases. (We’ll use ‘puzzlesolved’.)
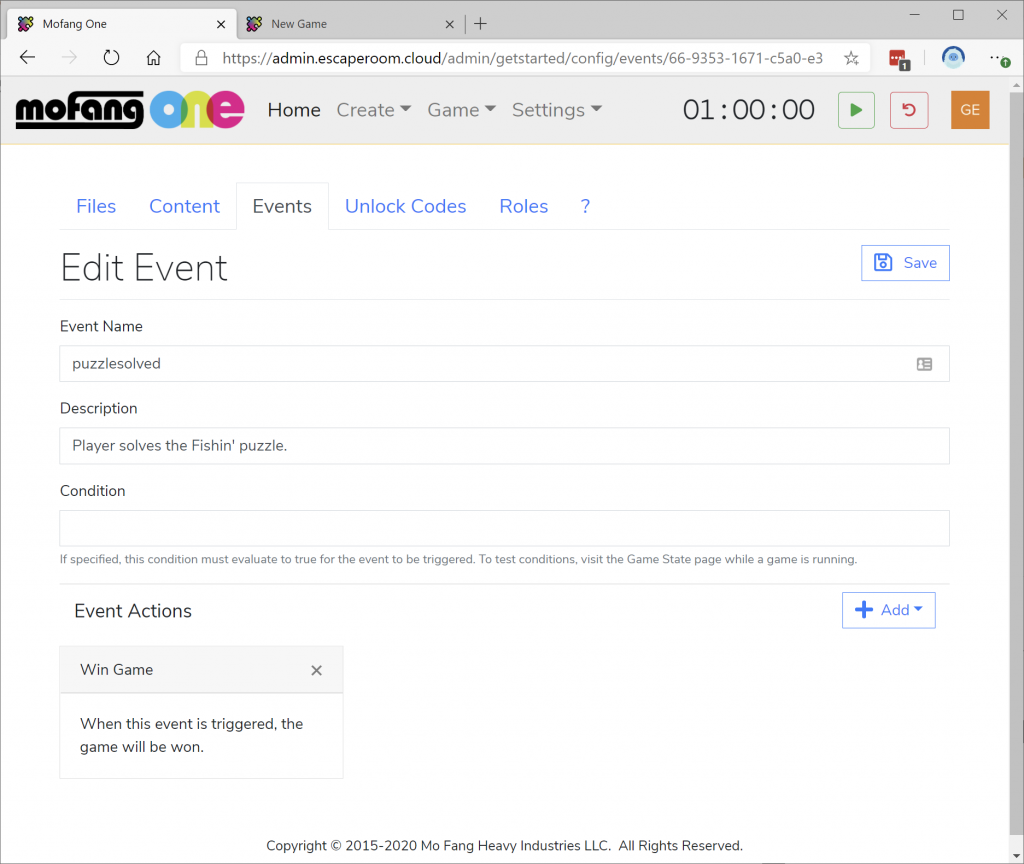
Now, let’s decide what we want our event to do! Events can have one or more actions that determine what happens when they are triggered. In this case, we want our event to win the game, but we could just as easily have chosen to unlock content, revoke previously unlocked content, or a variety of other choices.
Click Save to save the event. Now, let’s make an unlock code that triggers this event. Click the Unlocks tab, then click Add and enter the code you want to win the game. Then, on the Edit Unlock page, choose the puzzlesolved event you created in the previous step.
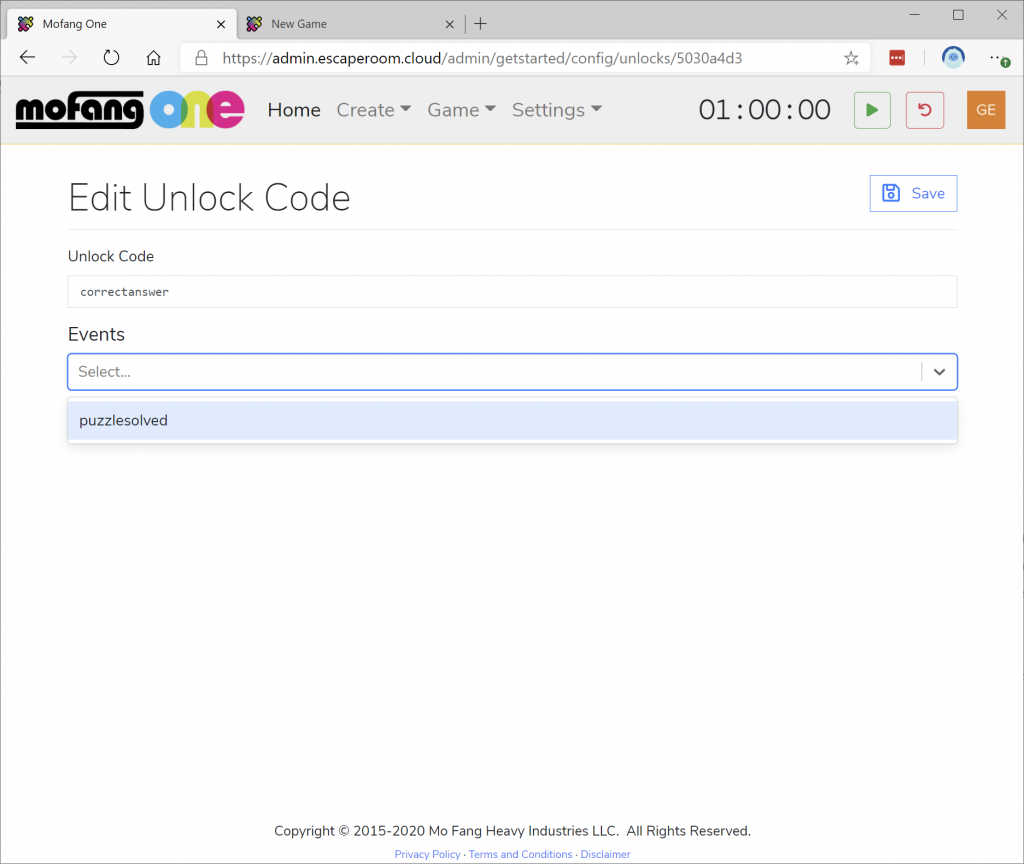
We’ve now created an event that wins the game, and an unlock code that triggers it.
Let’s create one more event. This one’s a special event, but it’s one that almost every game needs: if an event called “gamestart” exists, Mofang One will trigger it every time the game begins automatically. We can use this to unlock a set of content instantly when the game begins:
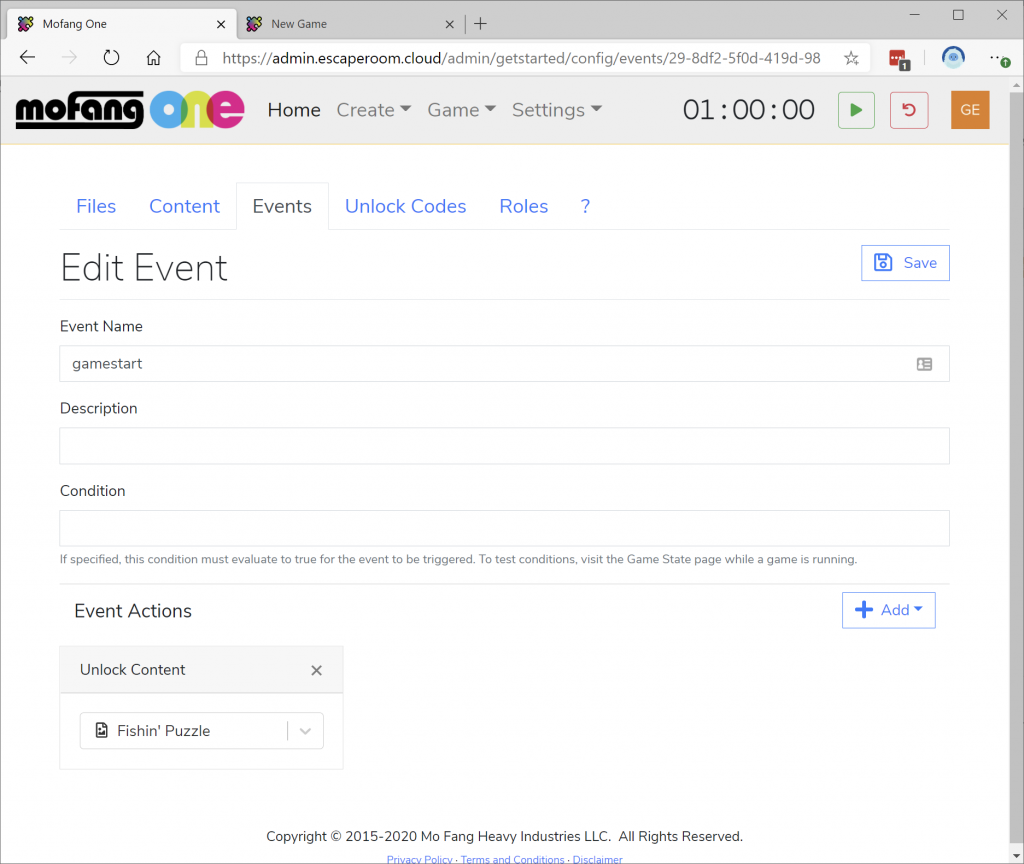
Now, let’s test the game to see everything in action. Click Play and switch back to your player view (which should work automatically without reloading the page). You’ll see the content unlocks automatically:

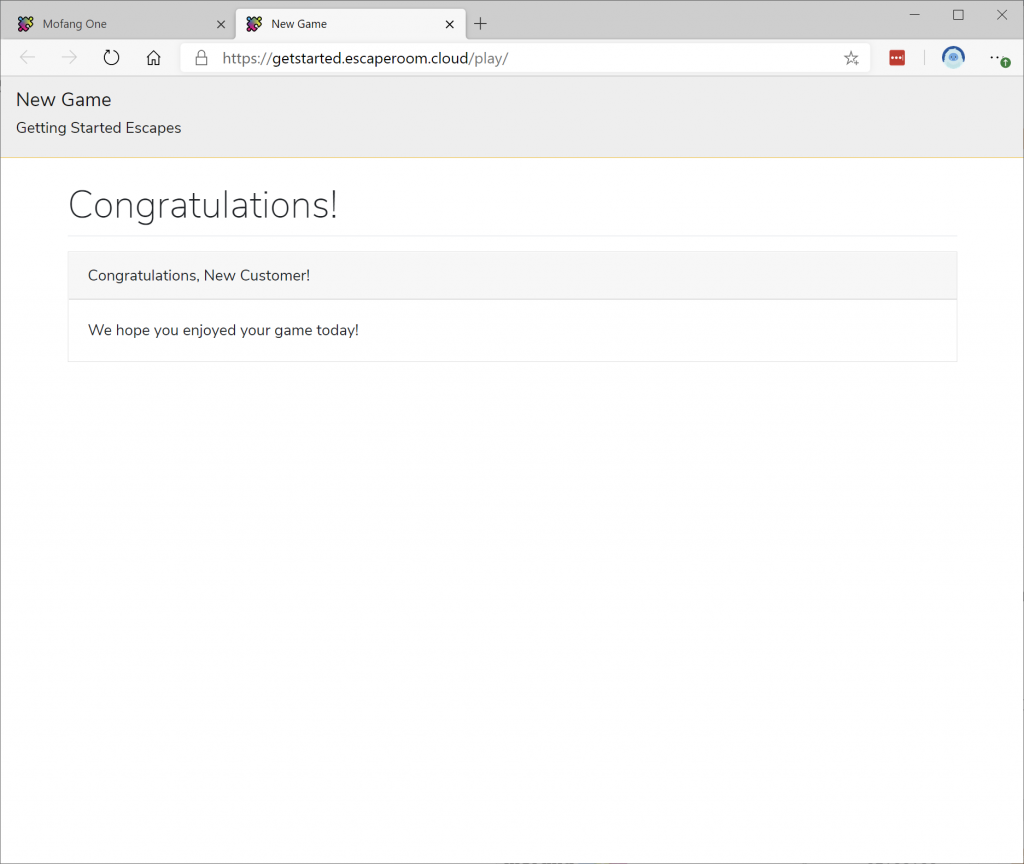
Now, enter your unlock code in the unlock box, and click Unlock. You’ll win the game:
Step 7: Create a control panel
Unlock codes are a great way to get up and running quickly, but many games choose to keep players more immersed in the experience by having a staff member unlock content for players “magically” as they progress through the game. In Mofang One, the easiest way to do this is by creating a custom control panel, a collection of easy-to-use buttons and controls intended to be used from a wrist-mounted phone or tablet by an avatar.
Mofang One gives you complete control over the design of your control panels, so you can make the wrist display match your game flow and keep your avatar focused on the players’ experience rather than on operating the technology.
Let’s create and test a simple control panel that can trigger our “puzzlesolved” event. From Create, choose Control Panels. Then, click Add Control Panel and name it Main.
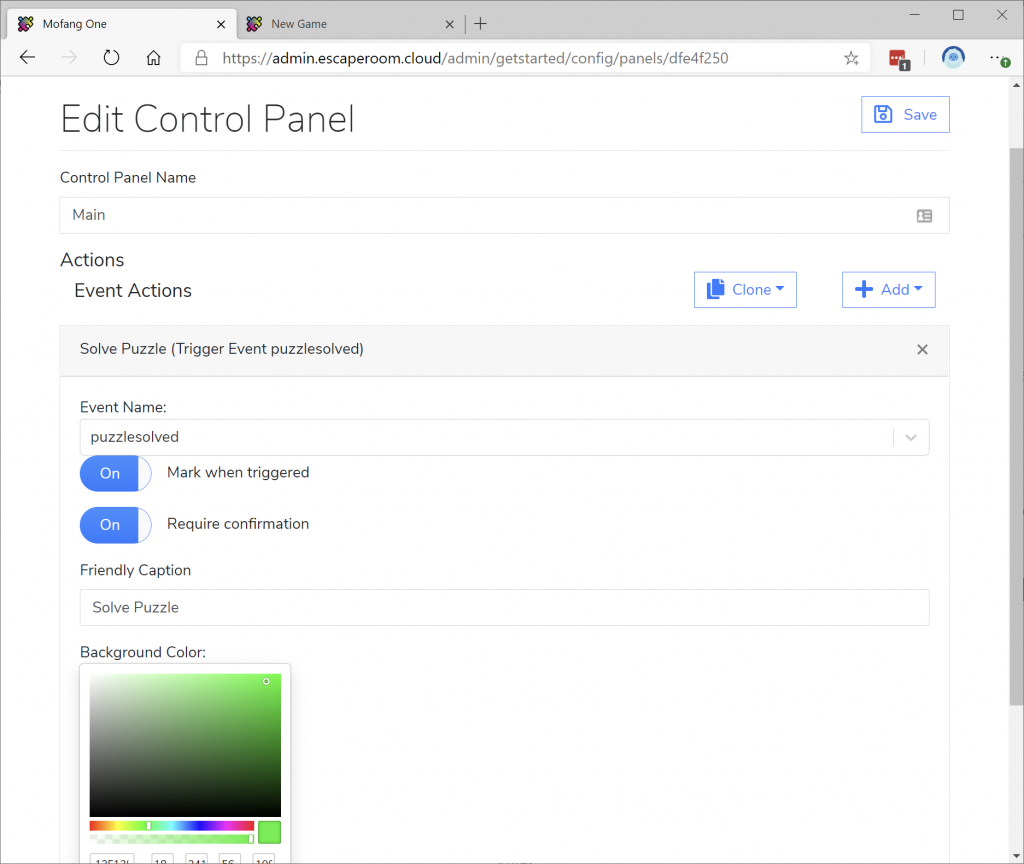
To design your control panel, add panel controls using the Add dropdown. We’ll add a single event button called Solve Puzzle that triggers the puzzlesolved event. You can customize the button color, show a checkmark when the button has been used, and even require confirmation for major game events to avoid accidental activations.
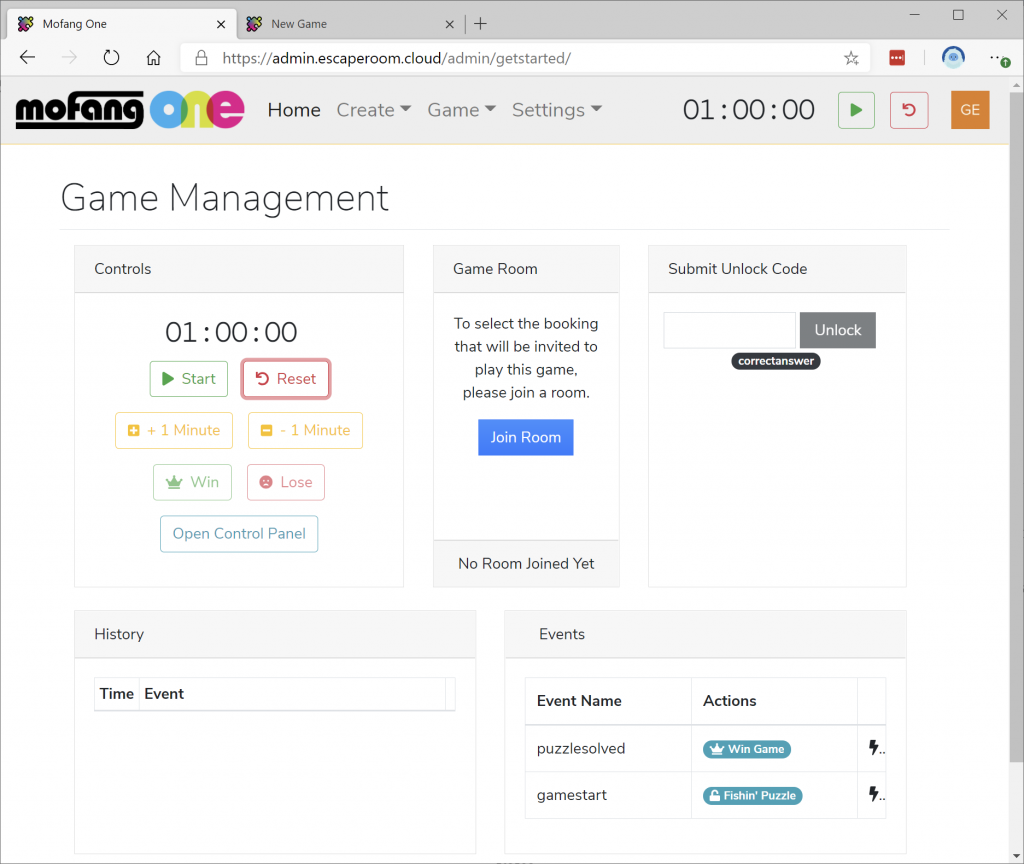
Click Save, then return home to the main page for the game. Click Start to begin the game, then click “Open Control Panel” to switch to the control panel view:
Click the Main button, and you’ll see the control panel you designed:
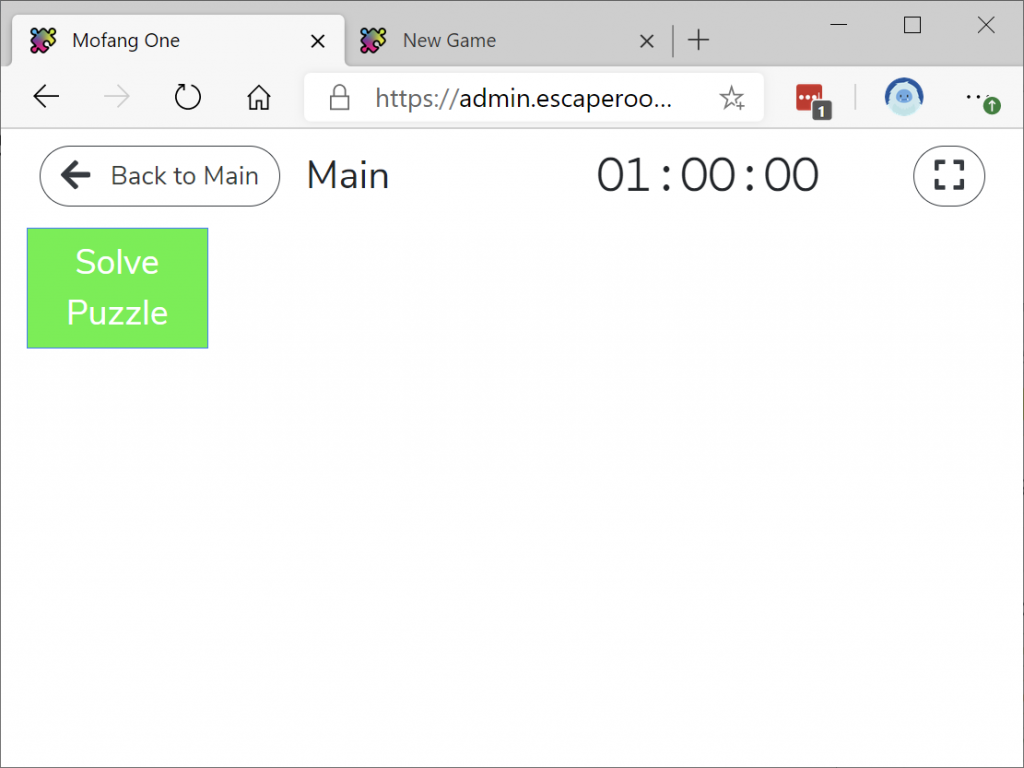
Click the Solve Puzzle button, and the game will be won just like if you submitted the unlock code!
Next Steps
Thanks for making it this far! This is just a taste of what Mofang One has to offer; we’ll be creating additional tutorials that help introduce our advanced features like:
- Drag-and-Drop Scenes
- Roles (allowing for split team collaboration puzzles)
- Programmability and Conditions (allowing for complex custom logic)
- Hardware integration (connect your existing MQTT-enabled tech props to Mofang One!)
- History/Undo (rewind to any point in the game if your host makes a mistake and unlocks something too early)
- OBS Studio Integration (trigger seamlessly integrated audio/video overlaid into the players’ Zoom call).
In the meantime, please join us on our Discord server at https://discord.gg/Y2GmkfzvGk . We are available anytime to answer your questions and offer advice on how to build your game, and you can also review past questions from other escape room creators to benefit from the community’s expertise! We monitor the server around the clock, but our core hours are 10AM-10PM US Pacific time, seven days a week. We’d love to meet you and learn what you’re building.
Thanks again for evaluating Mofang One, and we hope our service empowers you to build an amazing game that brings joy to players around the world!
